People have been using photos to make picture books for as long as people have had access to cameras.
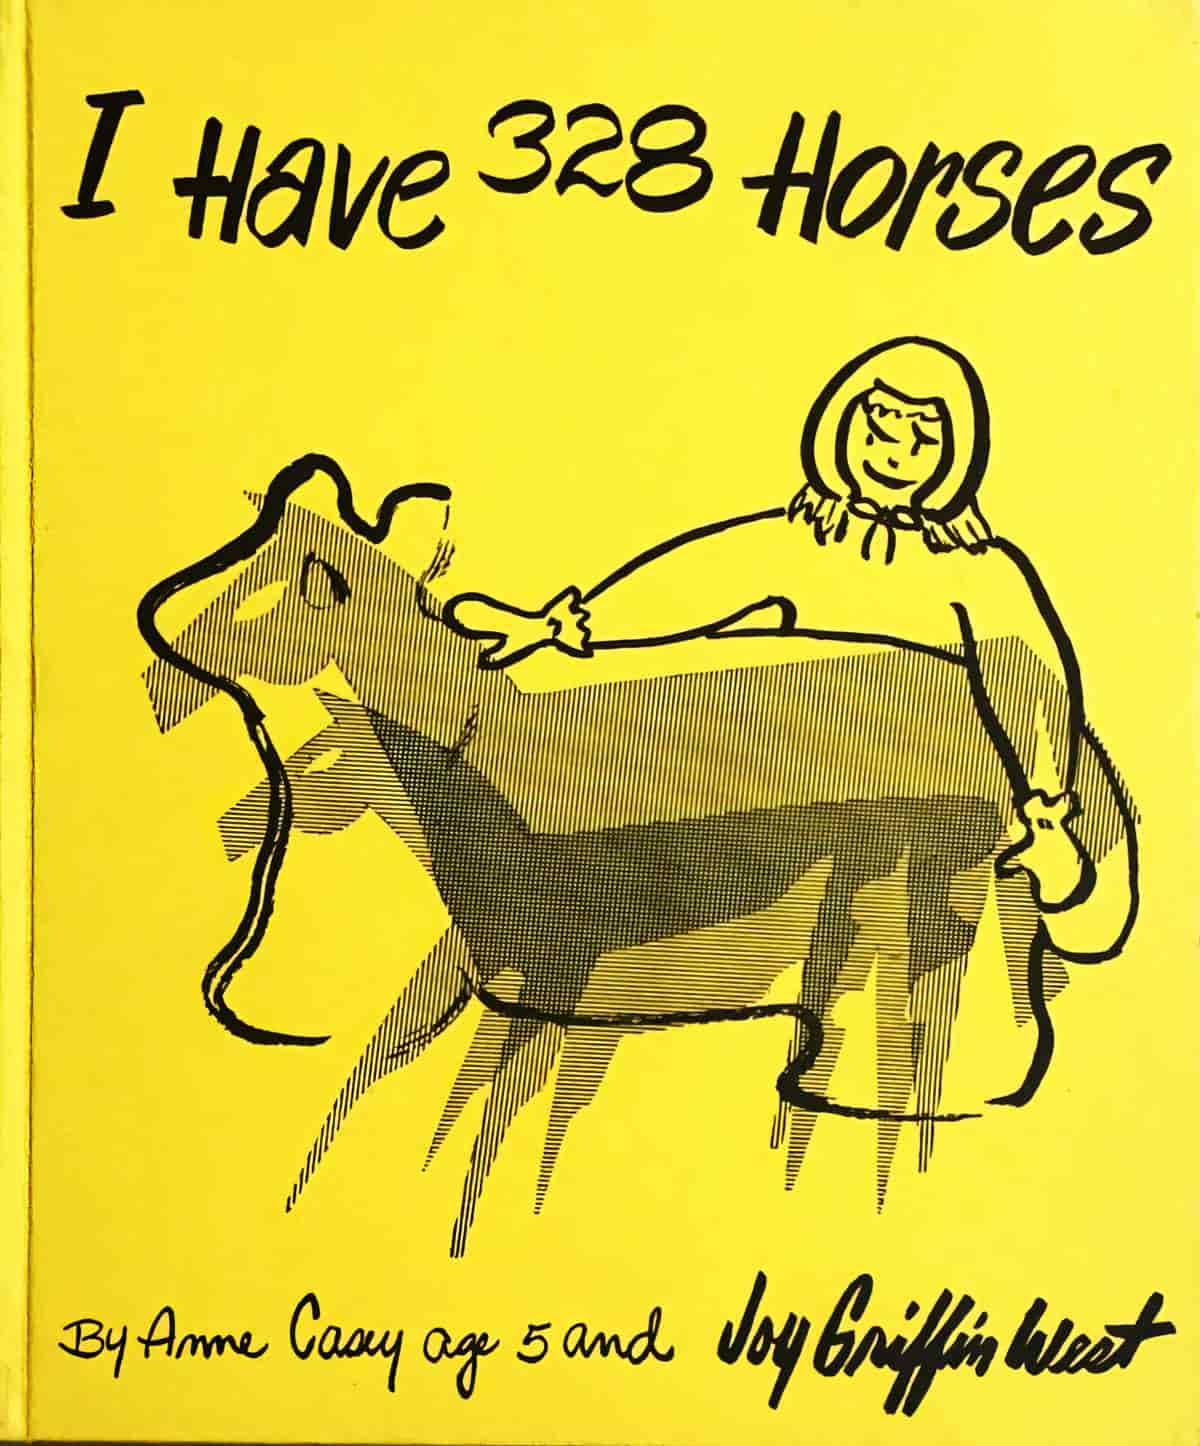
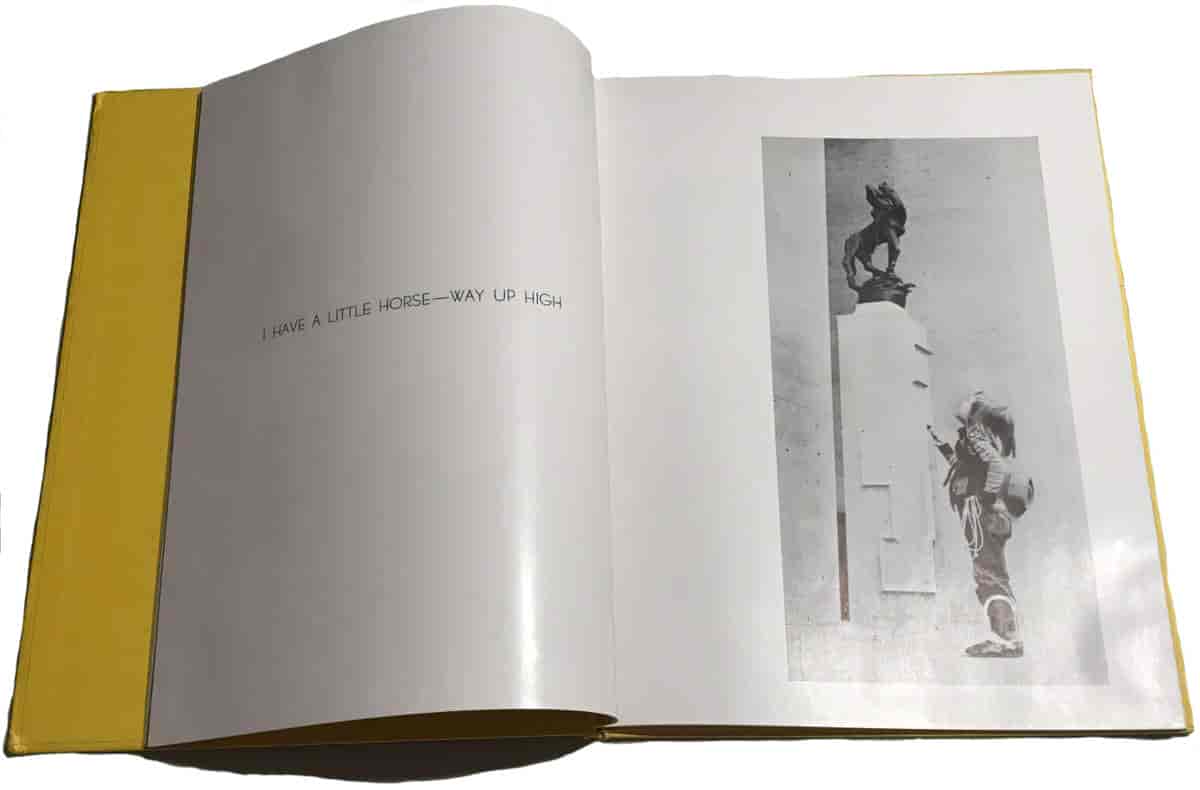
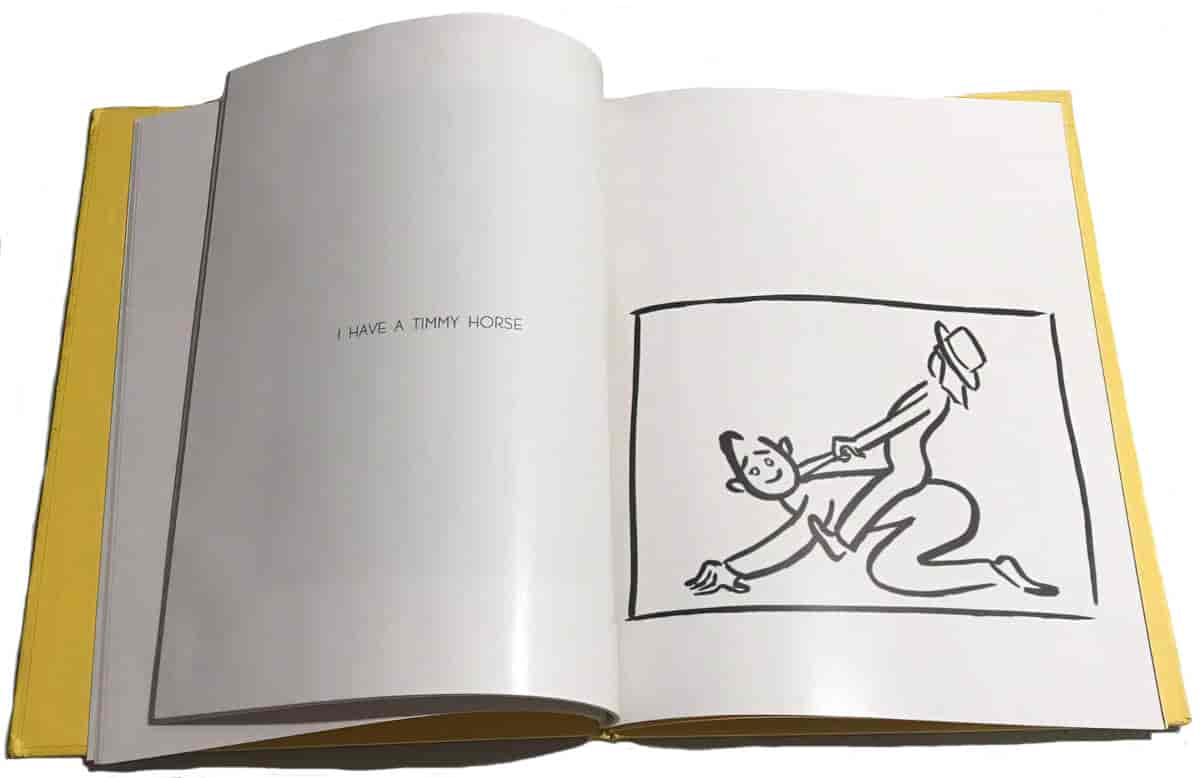
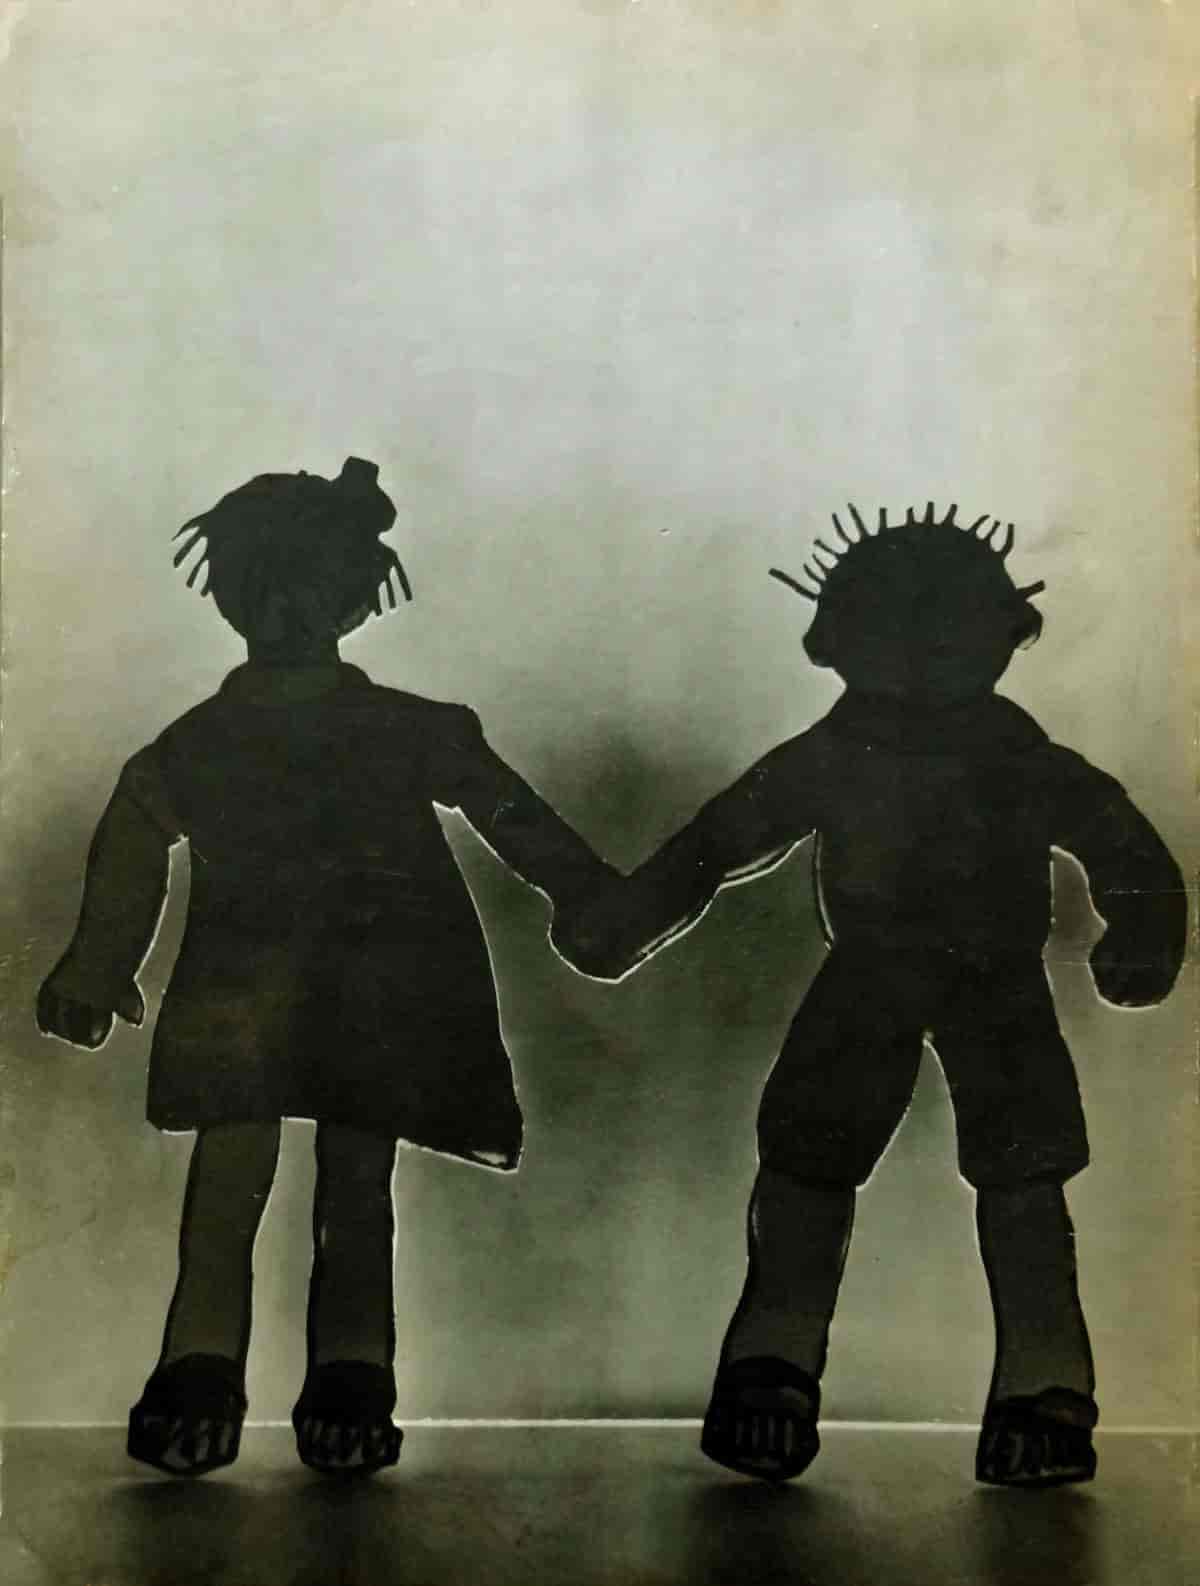
The small print-run picture book by Joy Griffins West and Anne Casey (age 5) was published in 1951. The book is a combination of black and white photographs interspersed with simple brush-line drawings done in a naïve style.
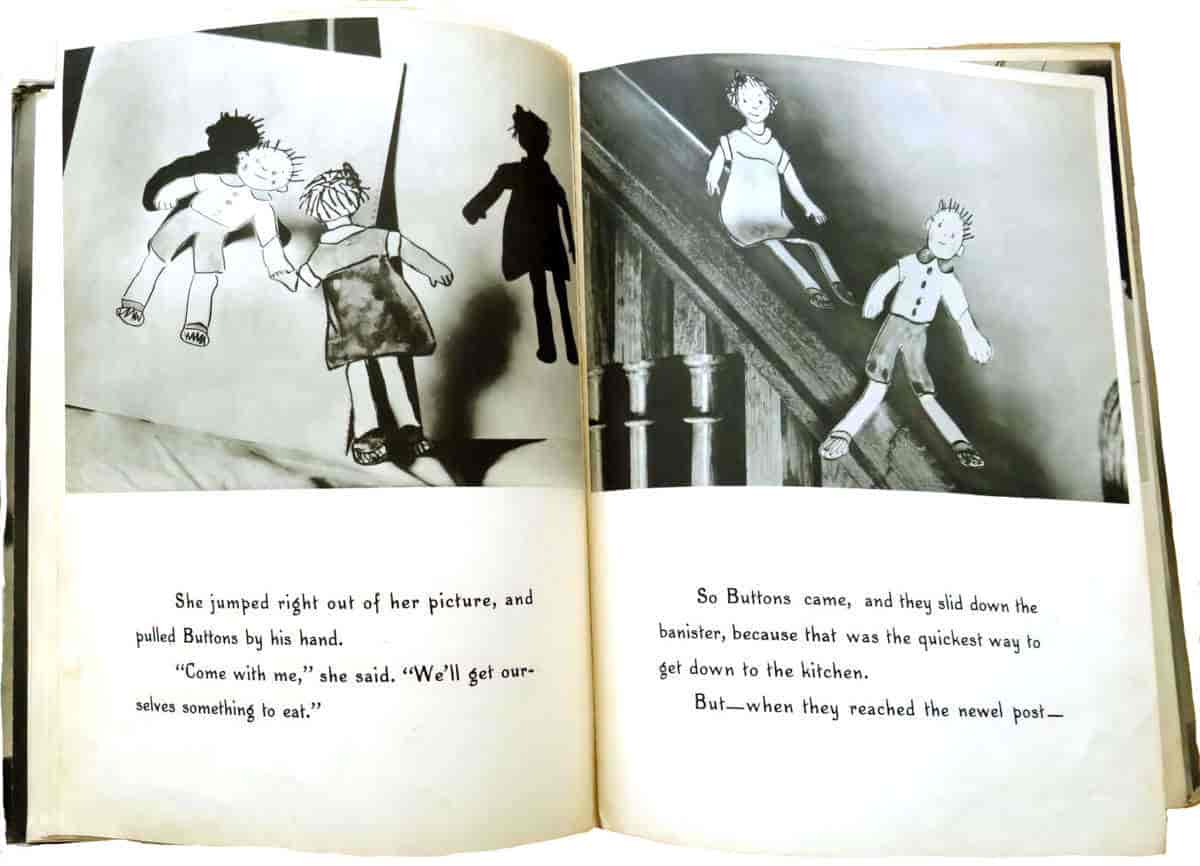
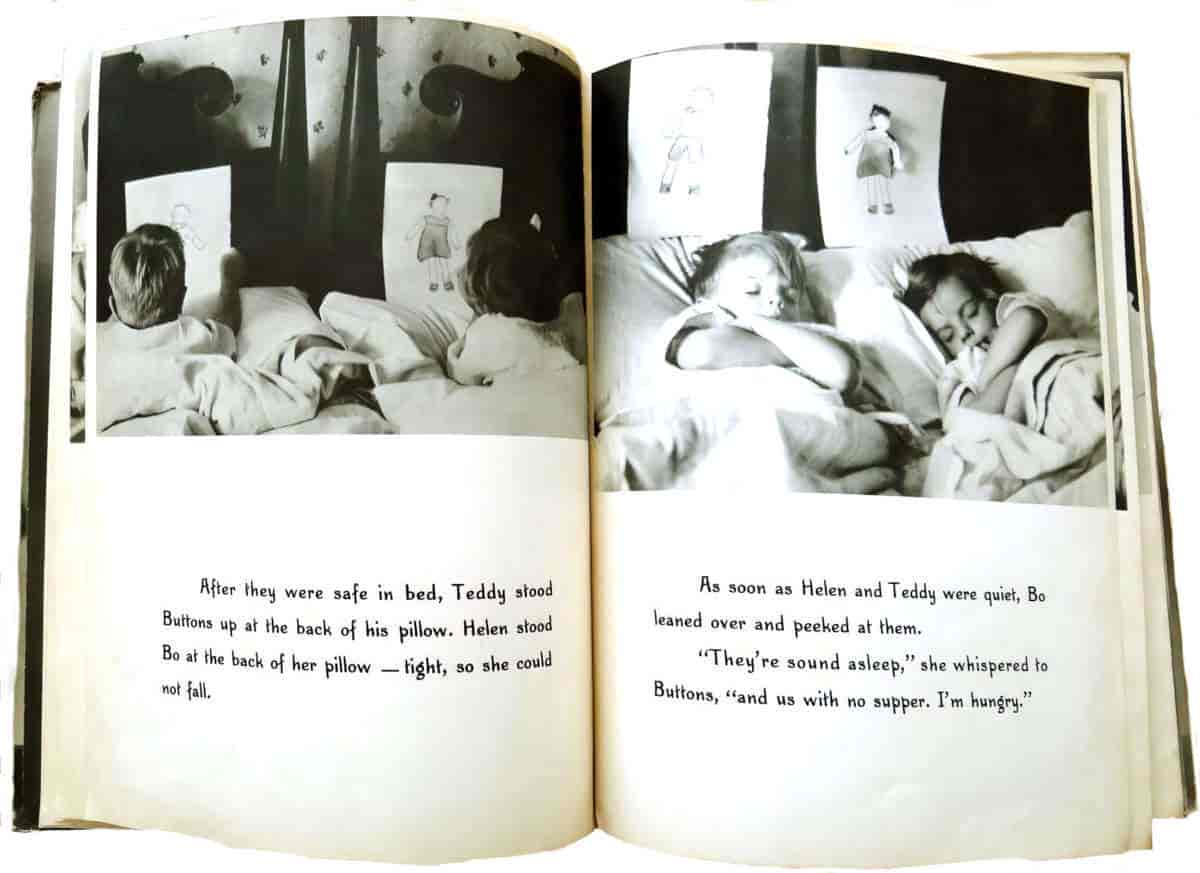
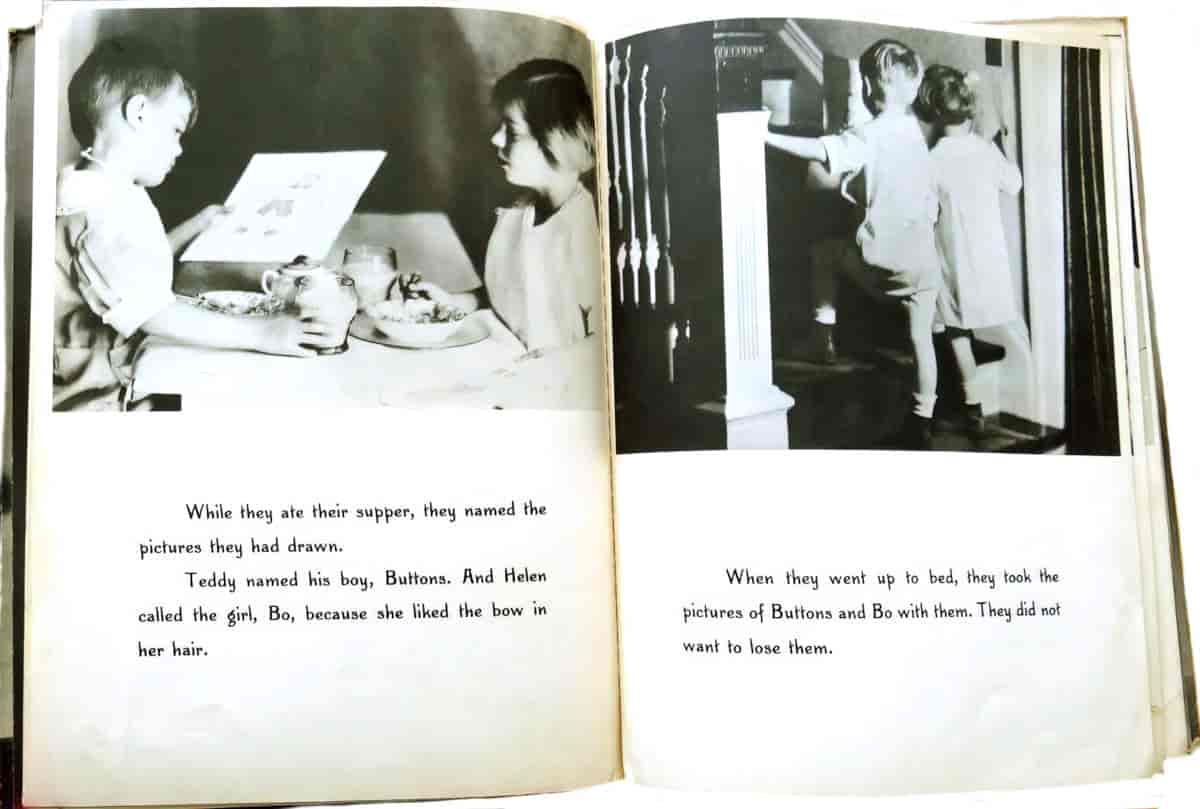
Another example of an early picture book created with photos is Buttons and Bo by Edna Billings. Published in 1940, this one is more sophisticated than the vanity project above, and counts as Postmodern. Photographed drawings come ‘to life’ at night, sliding down the bannister and so on when the children are sleeping.
How is a book like Buttons and Bo ‘Postmodern’? Let’s turn now to a best-selling contemporary example by American author illustrator Mo Willems.
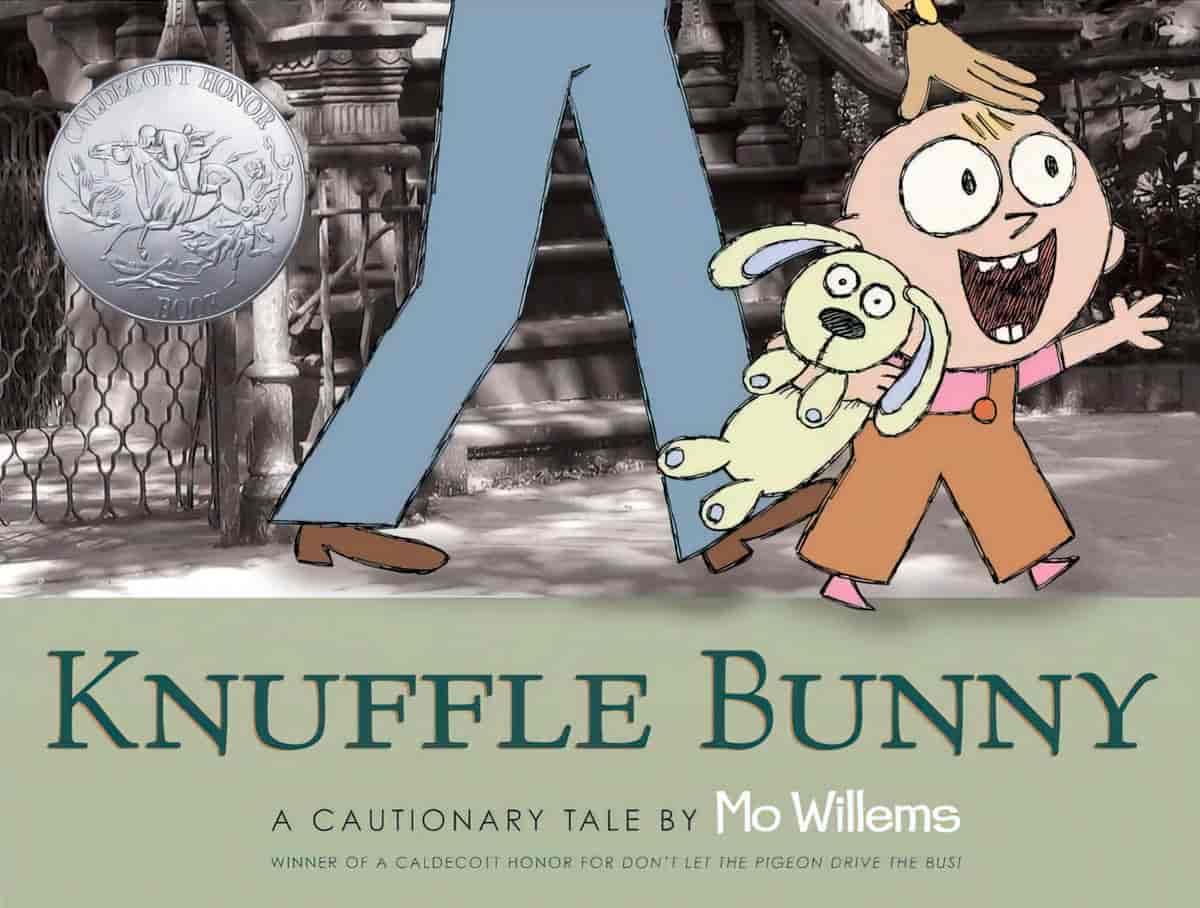
Knuffle Bunny: A Cautionary Tale by Mo Willems
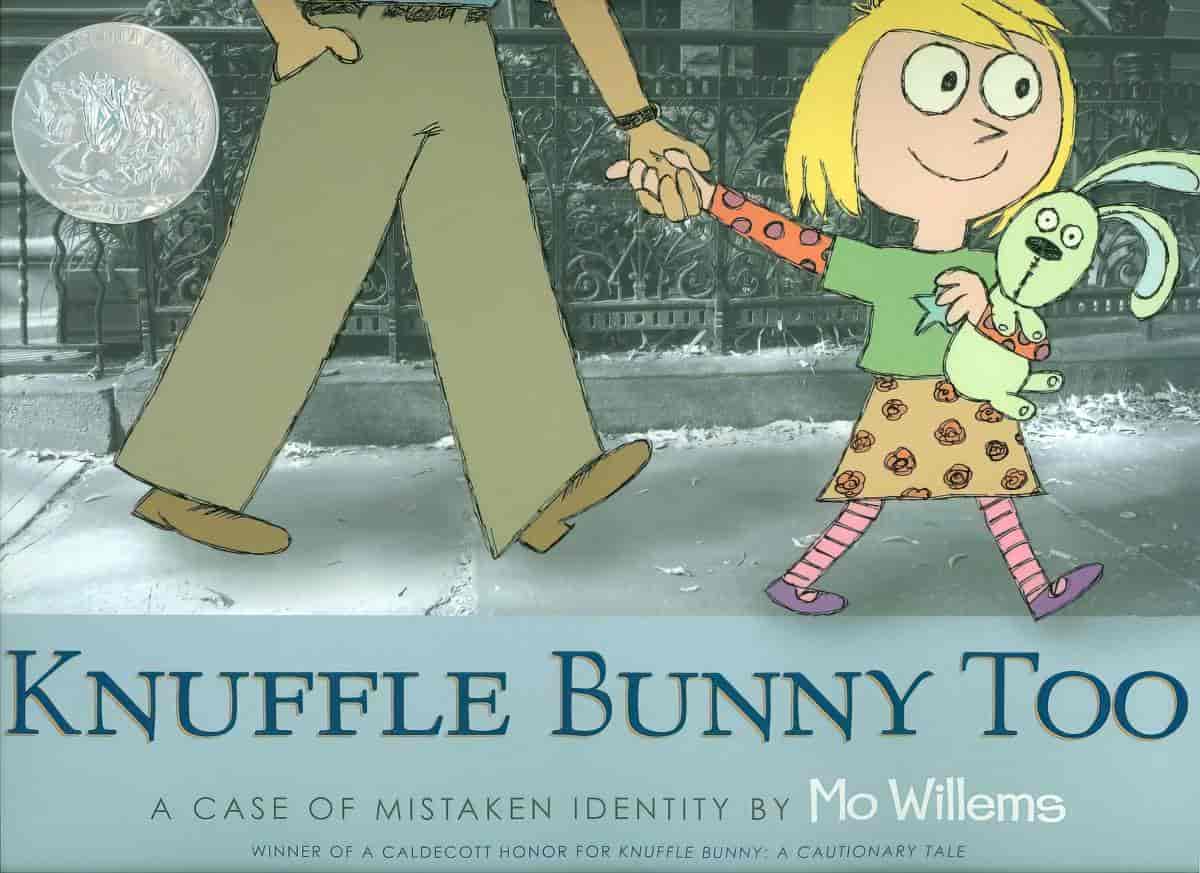
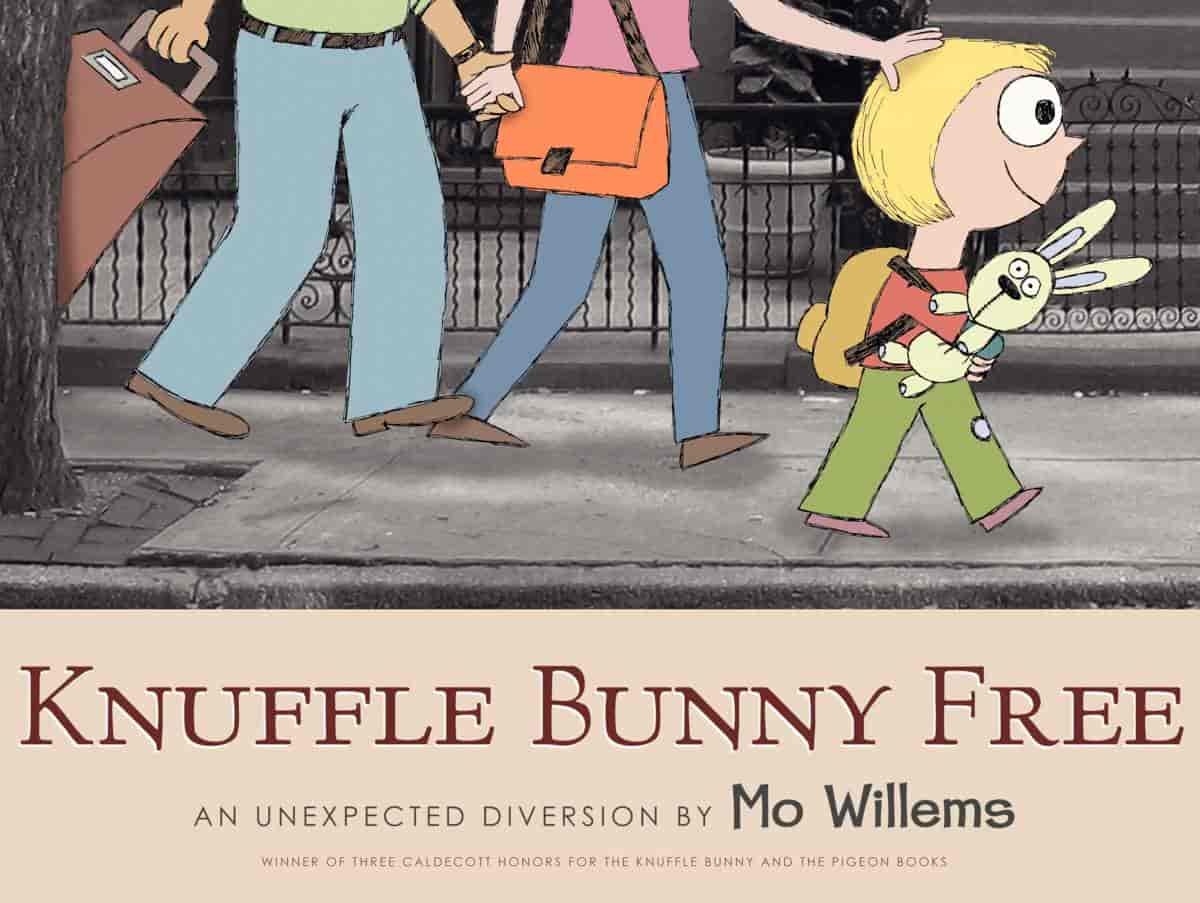
Knuffle Bunny: A Cautionary Tale by Mo Willems (2004) is [an] example of a postmodern picturebook. The story is about an event many young children and their parents have experienced, the loss of a beloved stuffed animal. Willems created the art using computer manipulated photographs and his handdrawn sketches. The effect of juxtaposing real and invented space and characterization presents a departure from the norm of maintaining a singular, coherent time and place. Sip and McGuire say “such books gesture toward convention just as they proceed to disrupt it” (in press).
A Unique Visual and Literary Art Form: Recent Research on Picturebooks
This unusual picture book blends cartoon like illustrations with evocative black and white photographs of Brooklyn. It tells the story of how ‘Knuffle Bunny’ gets lost on a trip to the laundromat with Trixie and Dad. Trixie’s attempts to alert Dad are unsuccessful, until Mum realises Knuffle Bunny is missing and the family go back to the laundromat to rescue the missing toy.
marketing copy of Knufflebunny
Stories about lost toys are not new. Many are pedestrian, but the good ones are truly great. (One of my favourites is Dogger by Shirley Hughes.)
The Knuffle Bunny series is created using desaturated photos of New York City with cartoon line drawings Photoshopped in.
PHOTOPEA: FREE ONLINE PHOTOSHOP
I can’t tell you how Mo Willems did this exactly but I can tell you how to achieve this technique with students using free online software called Photopea.
Basically, Photopea is the free online ‘equivalent’ of Photoshop, or what Photoshop was some years ago. It’s got some excellent features and really, more features than most non-digital artists will ever need. It certainly has enough functionality for this project.
You may also choose to use AI generated art, depending on how you feel about that. Stable Diffusion can now be used for free online.
STEP ZERO: READ MO WILLEMS BOOK(S)
The Knuffle Bunny picture books are likely held by your library, but you can also see them read online.
STEP ONE: Take some photos
They might be from around your house, around school, the shops. (Shopping malls don’t allow patrons to take photos, typically. Malls are considered private spaces. You can, however, photograph private spaces from a public space, such as a home or homeowner from the sidewalk across the street.)
For the example below, I’m actually starting with an image I generated using Stable Diffusion (the AI art generator tool).
STEP TWO: CROP AND RESIZE
If this story will remain digital (e.g. a PowerPoint presentation), you don’t need to worry about page sizes but if you plan to print on demand, or print on paper, make sure all the photo backgrounds are the same, and correct size for printing. Take gutters and trim size into account. (It gets a little complicated and young kids will need an adult to set up the template.)
STEP THREE: CREATE YOUR HAND-DRAWN ASSETS
If you have access to a drawing tablet you might do the whole thing on computer, but if you’re creating part of your story by hand, now’s the time to get that sorted using whatever media sparks your creativity.
When the paint has dried, use a scanner, or a camera on your phone with a scanner app to digitize the paper artworks. (The photo app method is quicker by far. I use the free Adobe one called Adobe Scan.)
STEP FOUR: PUT ALL ASSETS IN A FOLDER ON YOUR COMPUTER
Name the folder and put it somewhere you will easily find it.
STEP FIVE: DESATURATE THE BACKGROUND PHOTOS
Willems’ technique is a simple and effective way of getting the hand-drawn artwork to look good with the backgrounds. So let’s desaturate the background.
(Desaturate = make it black and white, or more towards black and white than colourful.)
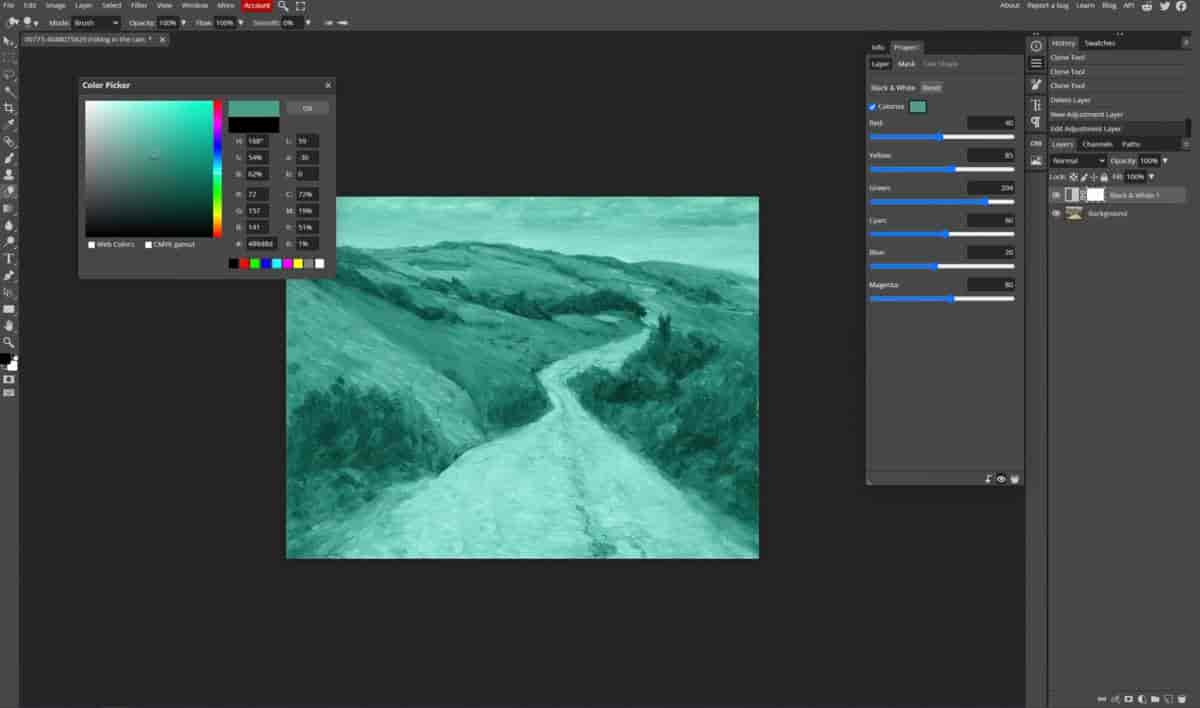
In PhotoPea you want to ‘Add Raster Mask’. Get that menu by clicking on the circle which looks half black, half white at the bottom, right hand corner there. Choose ‘Black & White’ from the options.

Once you click that, your background is black and white. If you’d prefer a tint, this is equally simple. See that Colorize box with the black rectangle beside it in the panel hovering to the right of the canvas?
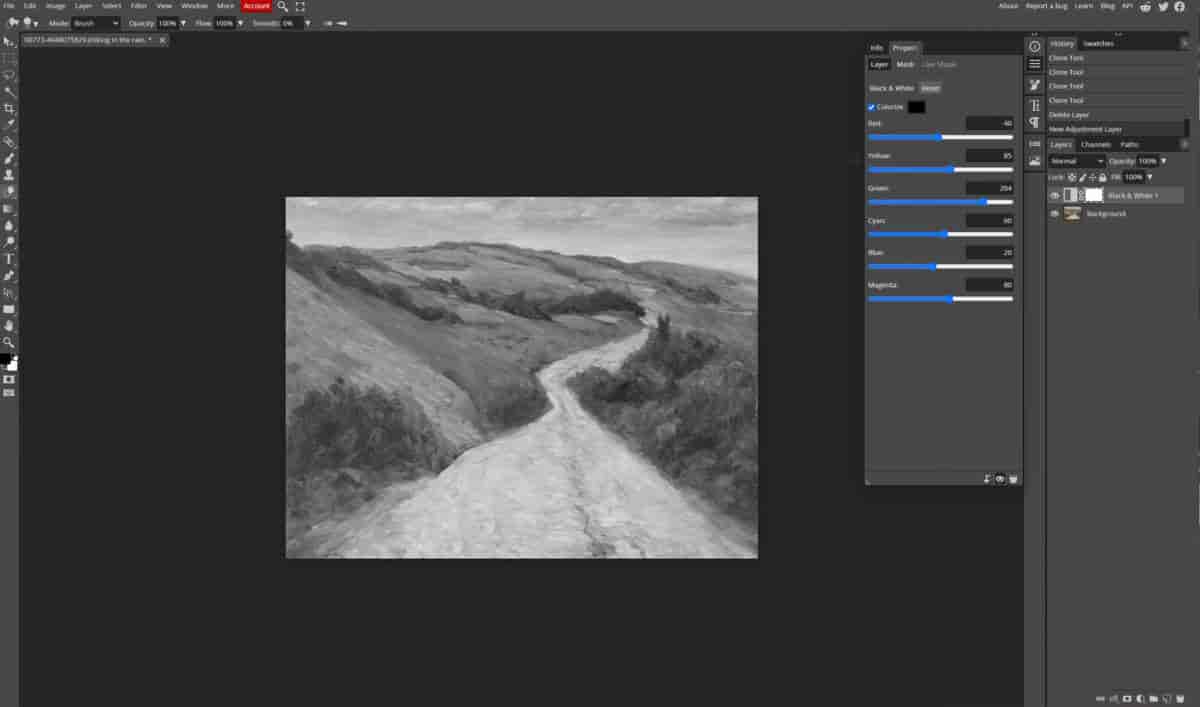
Click on the black rectangle beside ‘Colorize’ and you’ll get a colour wheel.
(You might also at any point use the Clone tool (on the left side of the screen) to get rid of anything you don’t want.)
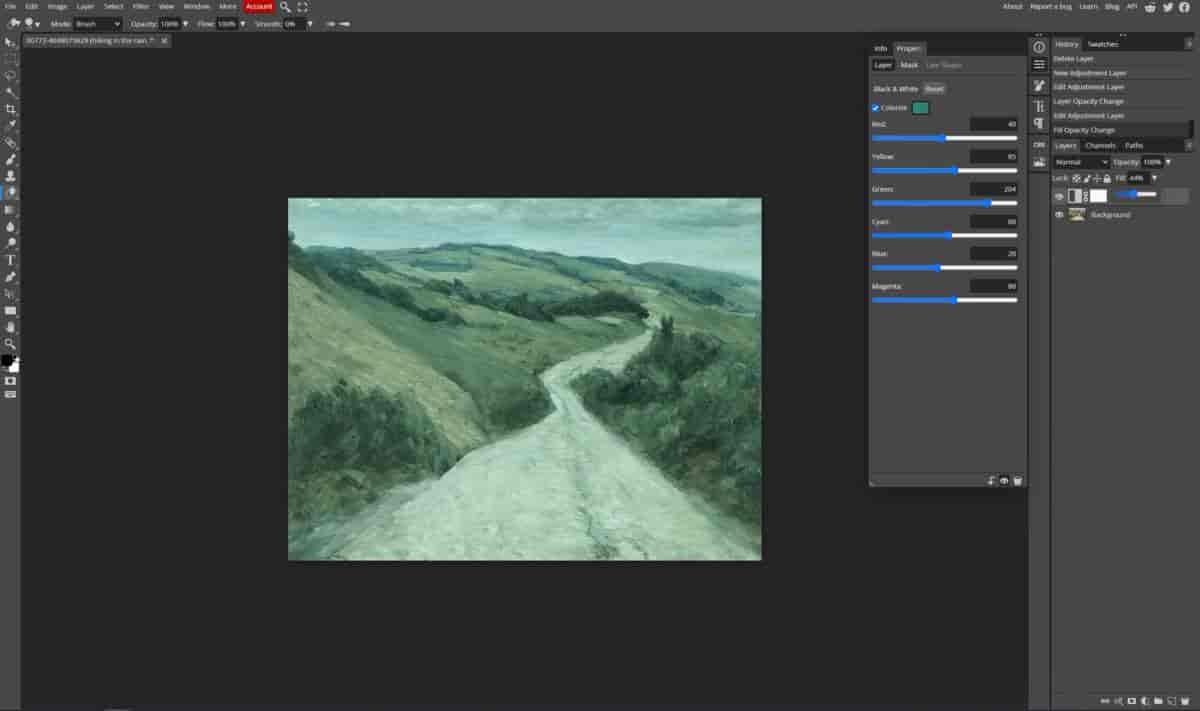
Now you can change the background to any colour.
That’s too green for me. On the Layers panel, I’ll decrease the opacity of the raster mask. There we go, a pleasantly overcast day.
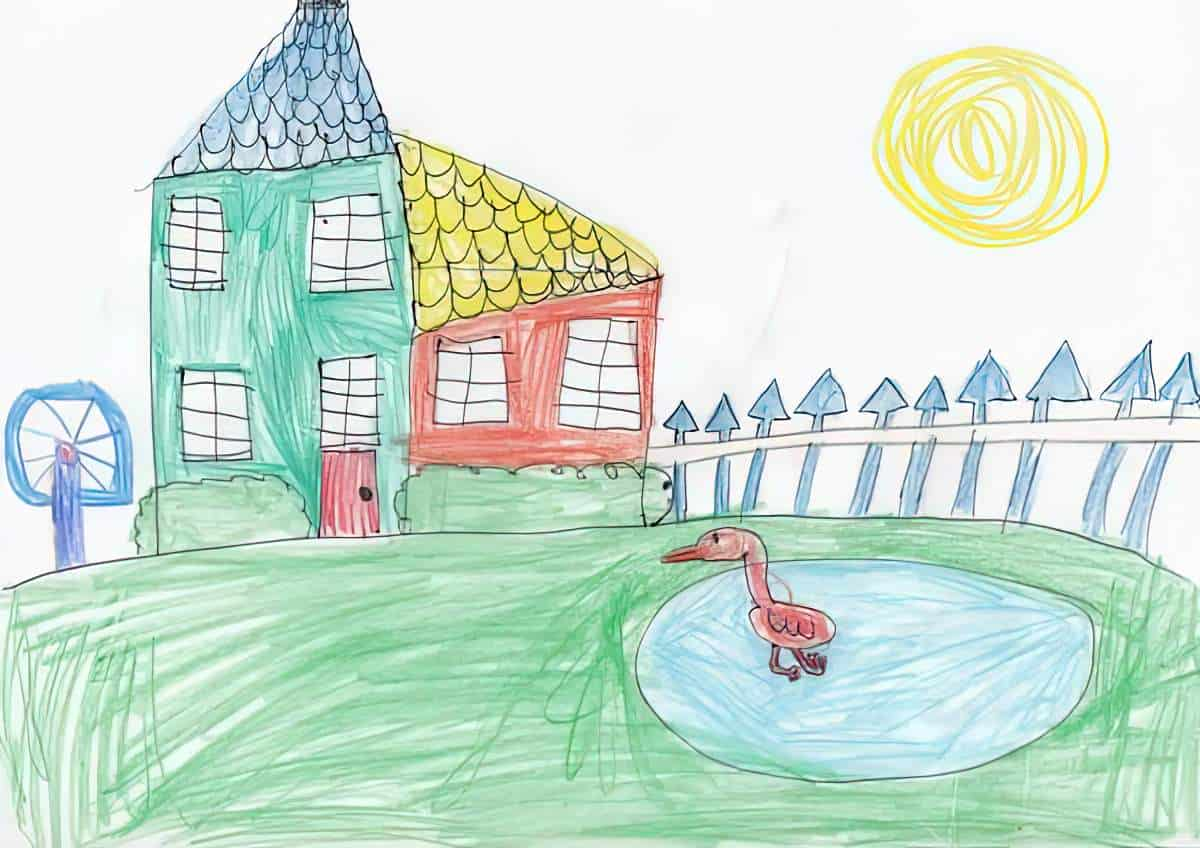
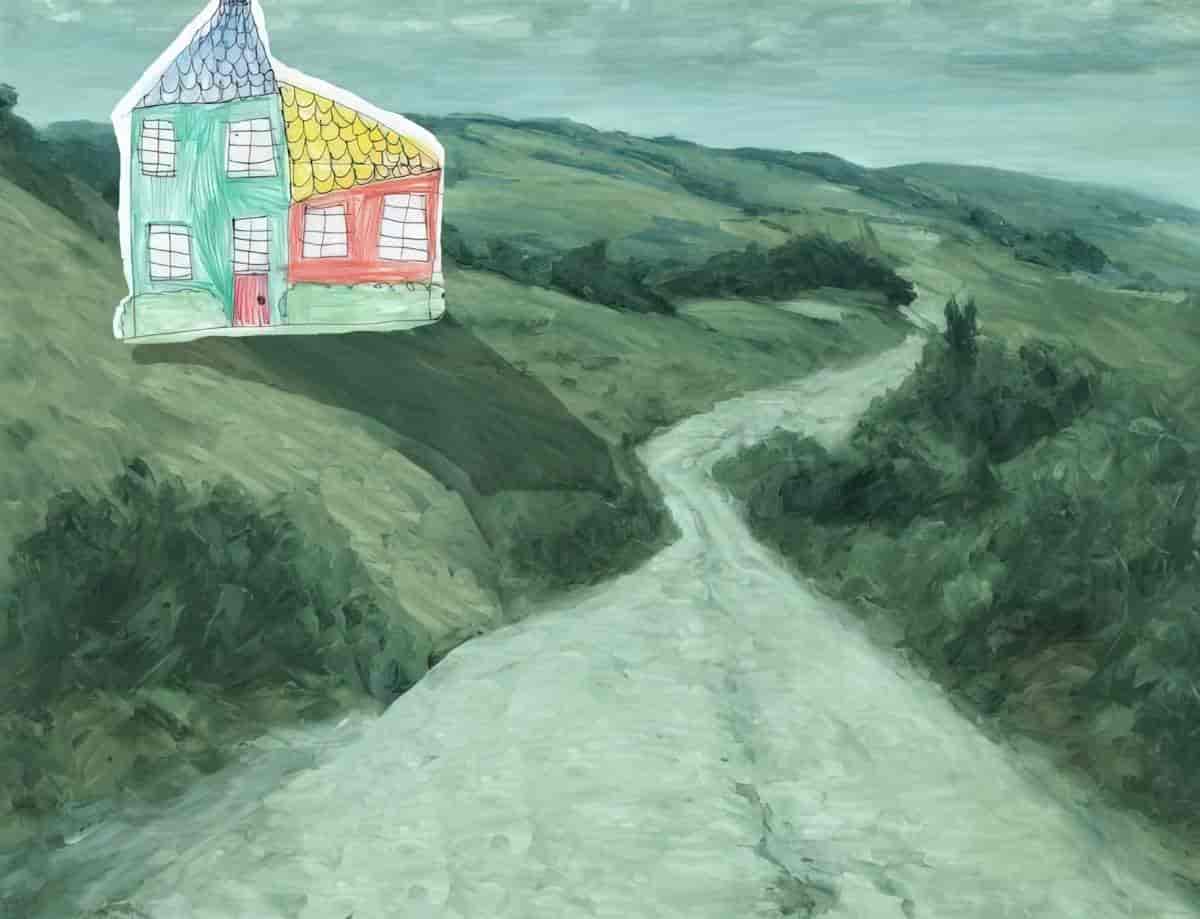
I’m using this drawing as my asset. My kid drew it years ago.
I drag it onto the canvas in Photopea. It becomes a new layer. I only want the house. The quickest way to remove everything but the house: Draw around the house with the lasso tool (on the left) and then invert the selection (i + shift +ctrl).
Now use a massive eraser to rub everything on this layer out but the house. Now we have a house on the hill. It very much looks plonked there, which is fine. You could use the eraser to tidy up the edges. This is not the professional (non-destructive way to erase, but for classroom use it’s fine. (Professionals create a layer mask and only erase on that. If they mess the erasing up, they can simply drag the asset back onto the canvas from their folder, but you may prefer to instil good digital art habits in your students and erase with the mask.)
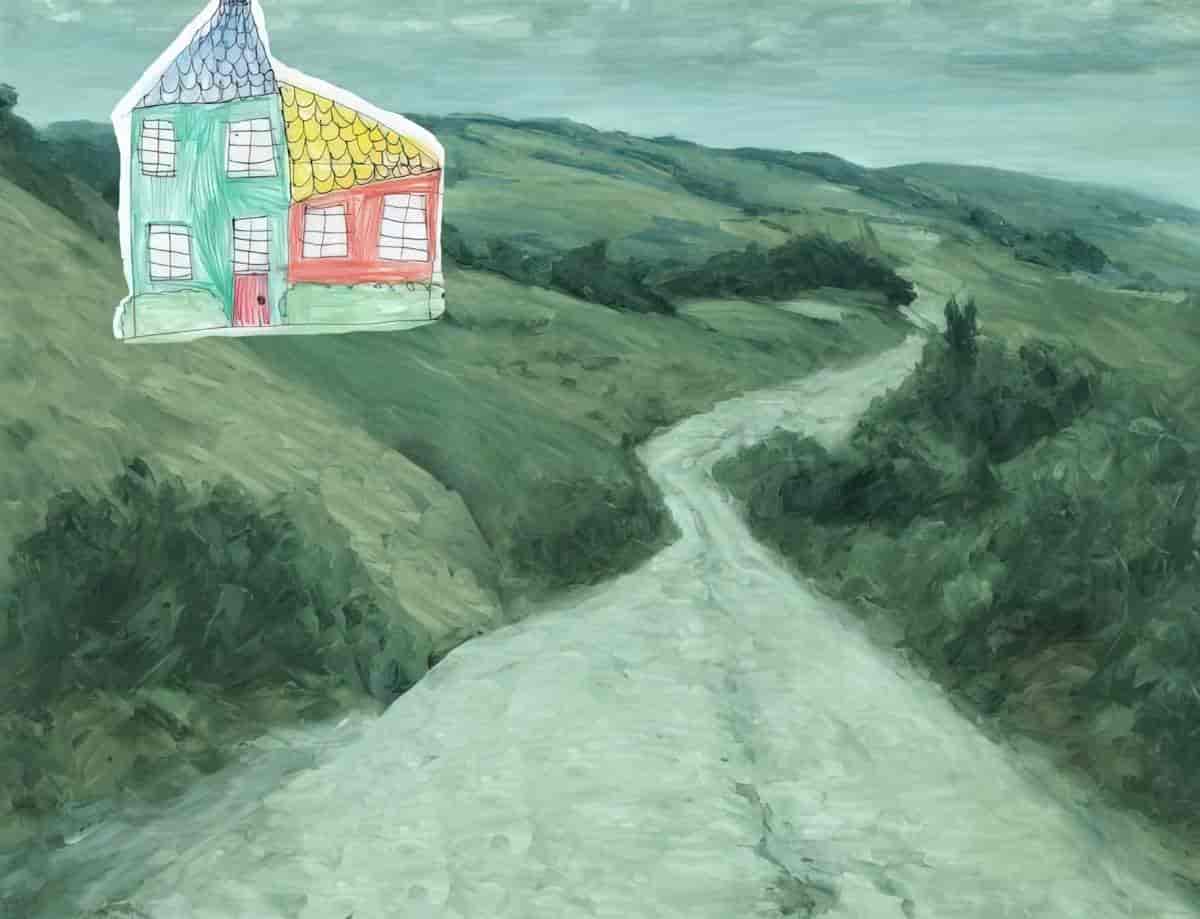
I want this house to look like a cut-out bit of paper collage-d onto a fine art painting so I’ll leave that as is. But if you’d prefer the hand-drawn asset to blend into the environment you can do what Mo Willems has done and add some shadow.
My shadow below is rubbish but you see the difference. (First decide where the sun/moon/other light source is coming from.)
Here’s how to make a shadow: With a black, basic brush, draw the shadow on a new layer. (Position the layer one layer below the asset.)
Set that layer to Multiply blend mode (on the Layers panel). Adjust the opacity as required. Darker shadows mean a stronger light source e.g. a bright sunny day. Low opacity shadows indicate a weak light source.
If there is more than one light source in your scene, you can create multiple shadow layers. This can look cool after experimentation.
Shadows don’t have to be black. I’m pretty sure Mo Willems has used the low-opacity-black-set-to-Multiply technique, and it’s fine. But you can also experiment with different colours and blend modes. (Complementary colours can work well.)

You can also add text inside Photopea when you’re ready. (See where picture book designers position text on a page.)
Keep going and eventually you’ll have a picture book. Picture books are always more time consuming they they look, even when making use of AI and photography, so keep projects short and manageable in the classroom.