Today I’m making some beautiful seamless patterns for digital scrapbooking. You might be after a new social media banner or something like that. In any case, making seamless tiles for patterns has become a lot easier lately.
I’ll be using the following software:
- Stable Diffusion AI Art Generator (free)
- Affinity Design (like Adobe Illustrator but less bloated and it’s one upfront cost rather than a monthly fee. When I say ‘one’ upfront cost, they just put out a new suite called Affinity 2 which required a re-purchase. I dunno, this will happen about once every five years maybe? Either way, it’s cheaper. If you’ve been using Adobe products for a long time, the hold up will be this: Affinity products can’t make use of your huge, established library of Adobe brushes, presets etc. You really will be starting from scratch there.)
- Artrage Vitae, a New Zealand made digital painting software. If you’ve owned Artrage before, think of it as ‘Artrage 5’. I used Artrage (and nothing but Artrage) to illustrate our digital book apps when the iPad first came out, but I’ve been doing other projects and haven’t really got the most out of my Artrage Vitae upgrade. But today I’ll be using a really cool feature in the Artrage Vitae release: Tiled Canvas. It’s super easy to use, but it’s hidden behind a menu and a tab, so you may not find it by accident.
HOW TO USE STABLE DIFFUSION FOR FREE
There is a one-click installer for Windows and Linux if you want to use this open source software on your own computer. No tech know-how required. Just a decent graphics card. There are other advantages to installing it on your own computer but for our purposes today, you only need the web version, below.
Automatic1111 is available free online to anyone with an Internet connection.
HOW TO MAKE A SEAMLESS TILE PATTERN WITH STABLE DIFFUSION
I haven’t eaten breakfast yet, so this morning I’m inspired to make a cute seamless fried egg pattern for seamless tiling purposes.
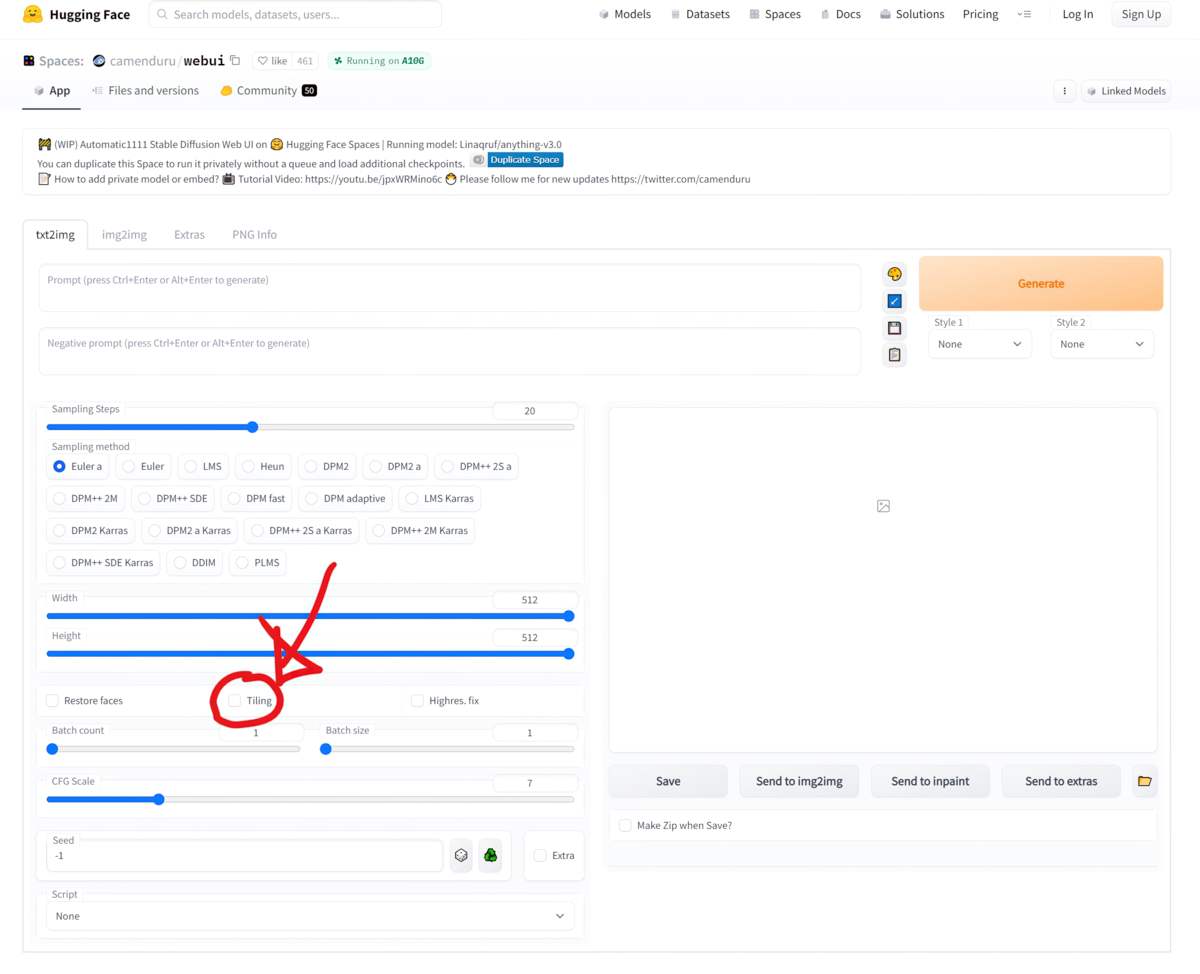
Fortunately, Automatic1111 (the Stable Diffusion fork used by the links above) makes this really easy: Set up a 1:1 dimension (a square) and check the ’tiling’ box.

I typed fried egg into the txt2img field, hit ‘Generate’ and got this. But I don’t really want a seamless tiled photo. I want it to look more painterly than that.
So I click ‘Send to img2img, then select one of my pre-saved styles, which happens to be:
((((by artist Carel Weight)))), ((((by artist Walt Peregoy))))
(I made this style before the weighting method was updated. These days you could just type (by artist Carel Weight:1.4), (by artist Walt Peregoy:1.4), or even put the two artists in the same brackets.
You could skip this next step if you did it right the first time and asked for a painterly style. Still, the img2img tab comes in handy even if you never ever forget to check stuff.
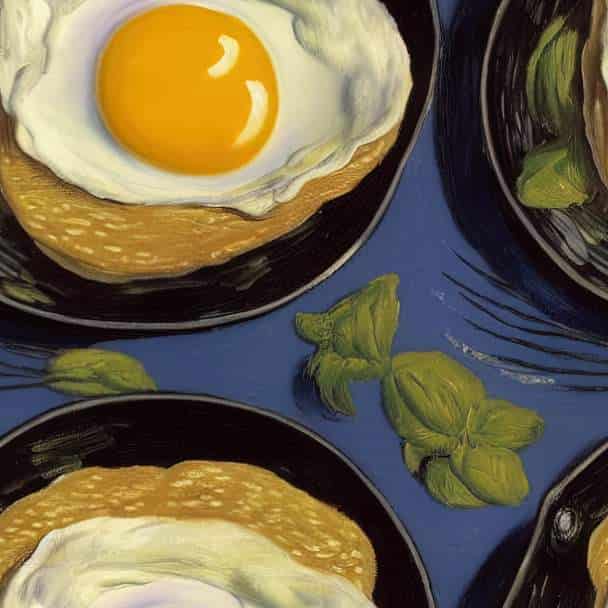
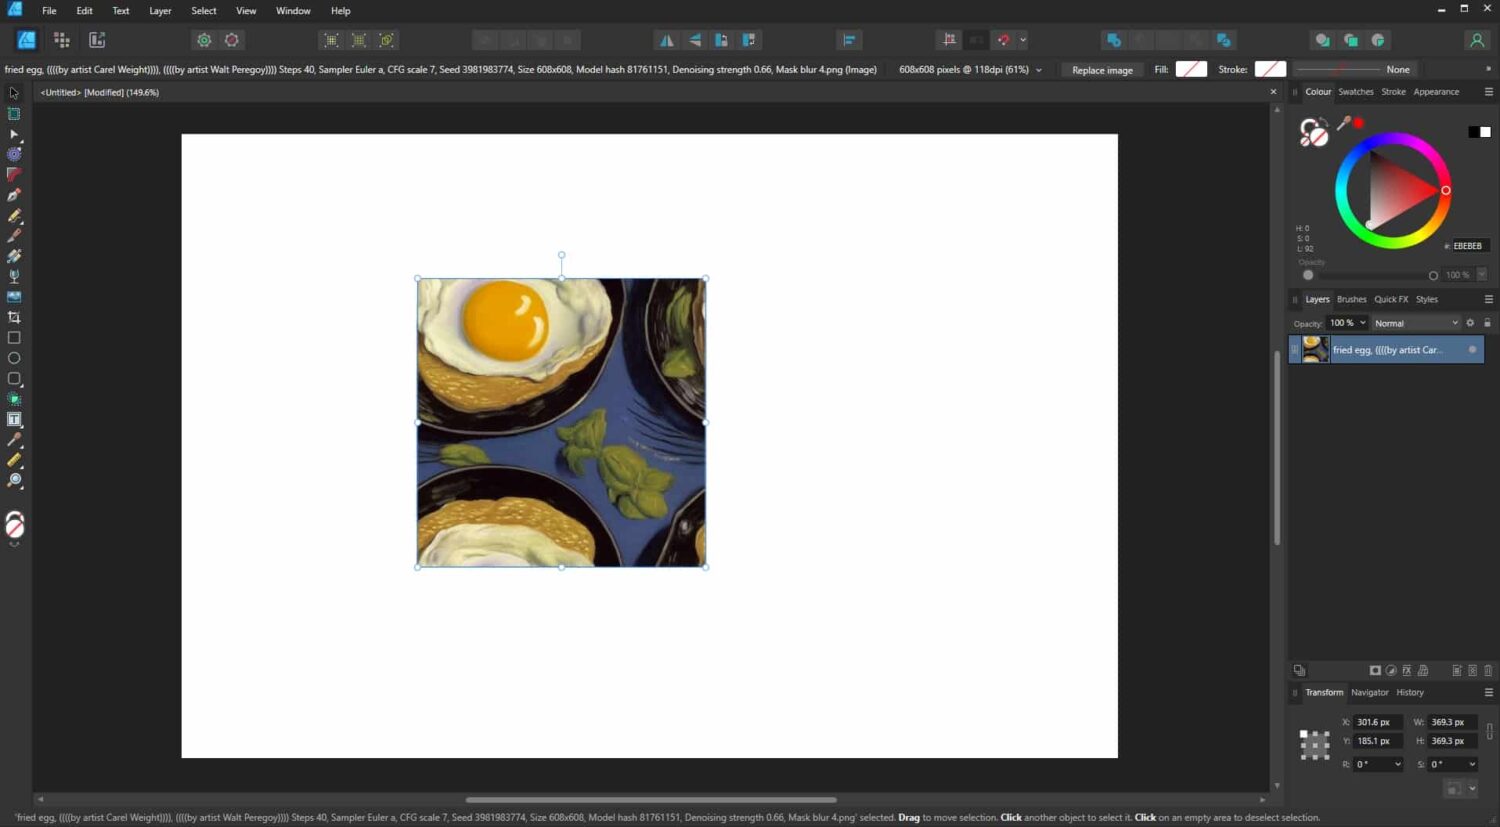
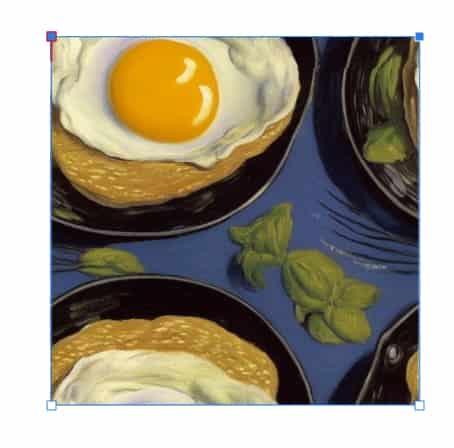
With the art styles of Carel Weight and Walt Peregoy applied, I get this. For some reason the herb has changed, but I don’t care about that today.
I’d better tell you the parameters. When doing this sort of thing, it’s the Denoising strength that you’re going to want to fiddle with the most:
Steps: 40, Sampler: Euler a, CFG scale: 7, Seed: 3981983774, Size: 608×608, Model hash: 81761151, Denoising strength: 0.66, Mask blur: 4
So now we’ve got a seamless tile, but it’s not a pattern yet. What to do with it now? For that we need some art/design software.
HOW TO PATTERN A SEAMLESS TILE IN AFFINITY DESIGN
Does this thing Stable Diffusion gave me even work as a tile? Let’s import it into Affinity Design and see. (tl;dr: It does. Stable Diffusion tiles always work perfectly as seamless tiles.)
In Affinity Design, create a new document. Make the document however big you want the final pattern. (Seems like a duh instruction, but that’s not actually a given when some software deals with infinite canvas.)
Now you’re looking at a blank document. Go to File > Place.
Find your tile in the file where you saved it.
Use your mouse to drag it to an approximate size somewhere on the page. (Where? Doesn’t really matter. We’re tiling this thing. You’ll also be able to change the size and direction of the pattern later.)
(Alternatively, you can simply drag it from a folder onto the canvas, though this has the small disadvantage of not asking you upfront how big to make the tile on the canvas.)
Right click on the image. Select Convert to Curves.
Now it’s a vector shape. See the edges are now squares? Those tiny squares are ‘nodes’.
Vector shapes are recognisable by their nodes. Nodes are editable. You can add and delete them, and basically change the shape of this thing to anything you want. (Today I’m leaving it as square. I only want to fill the entire canvas.)
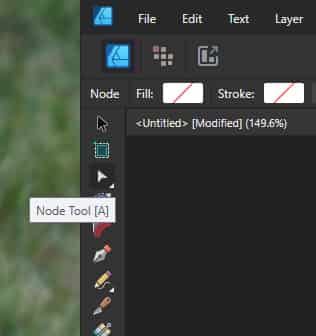
Select the node tool. (The little white arrow on the left there.)
What’s the difference between the black arrow and the node arrow?
The black (Select) arrow lets you move the entire shape around the canvas, but the Node tool lets you deal with individual nodes on any given shape.
This next step may give you the impression that there’s something glitchy with the software. It looks glitchy, but it’s not.

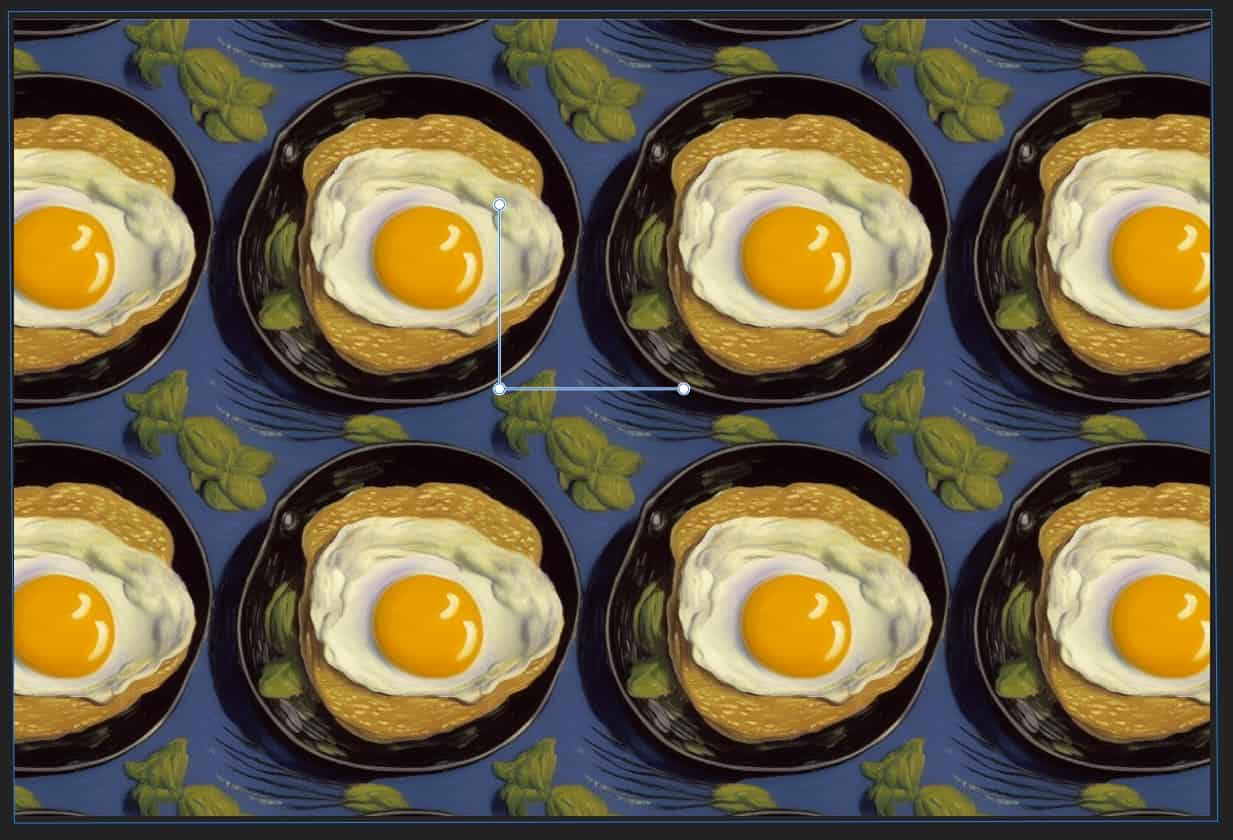
With the node tool selected, drag to select both nodes on one side of your tile.
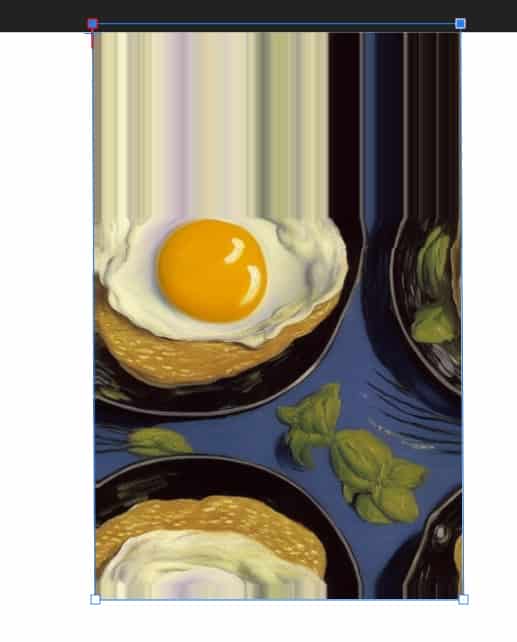
Next, drag one of those nodes to extend the entire side all the way to the edge of the canvas.
It will do this paint smear thing. See what I mean about ‘looks glitchy’? Don’t worry, it’s supposed to do that. The software has to fill the extended shape with something, right? Otherwise the end user won’t know it’s been filled.
For now it’s taken the pixels on the edge and repeated them.
Do it again with another side.
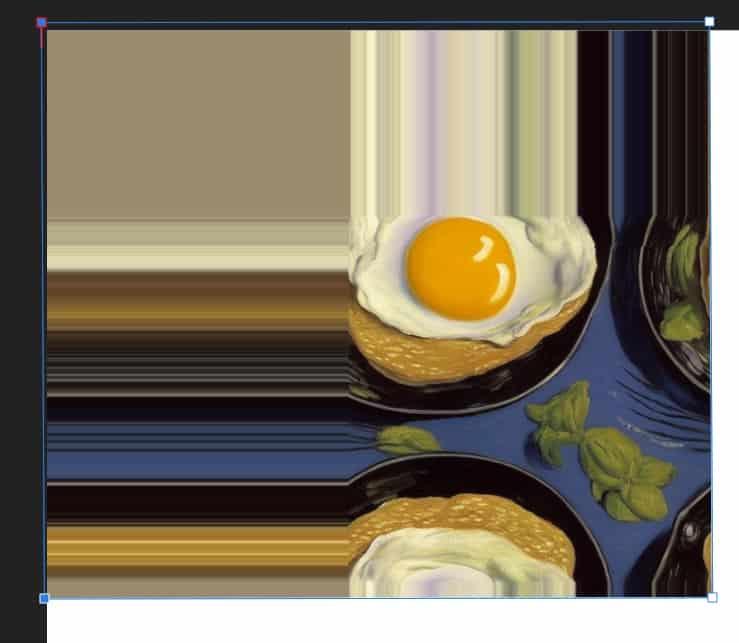
Extend all four sides until it looks like this.
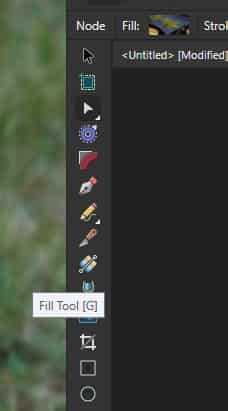
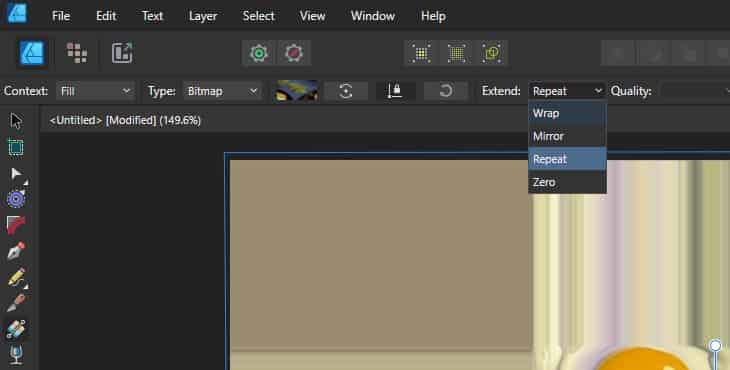
Now select the Fill tool. (You may know this as the Gradient tool in other software. But Fill is a better word for it! We’re not using gradients today. Vector shapes can be filled with other things, like solid colours and raster images like our Stable Diffusion seamless tile.)
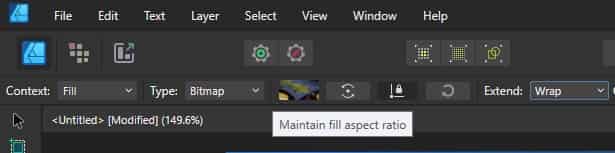
Before you do anything else, make sure Maintain Aspect Fill Ratio is checked. (It comes checked by default. But some mofo (usually yourself) may have unchecked it, I dunno.
Across Affinity software, the black colour means it’s checked. Grey means it’s unchecked. (I don’t find this at all intuitive, myself.)
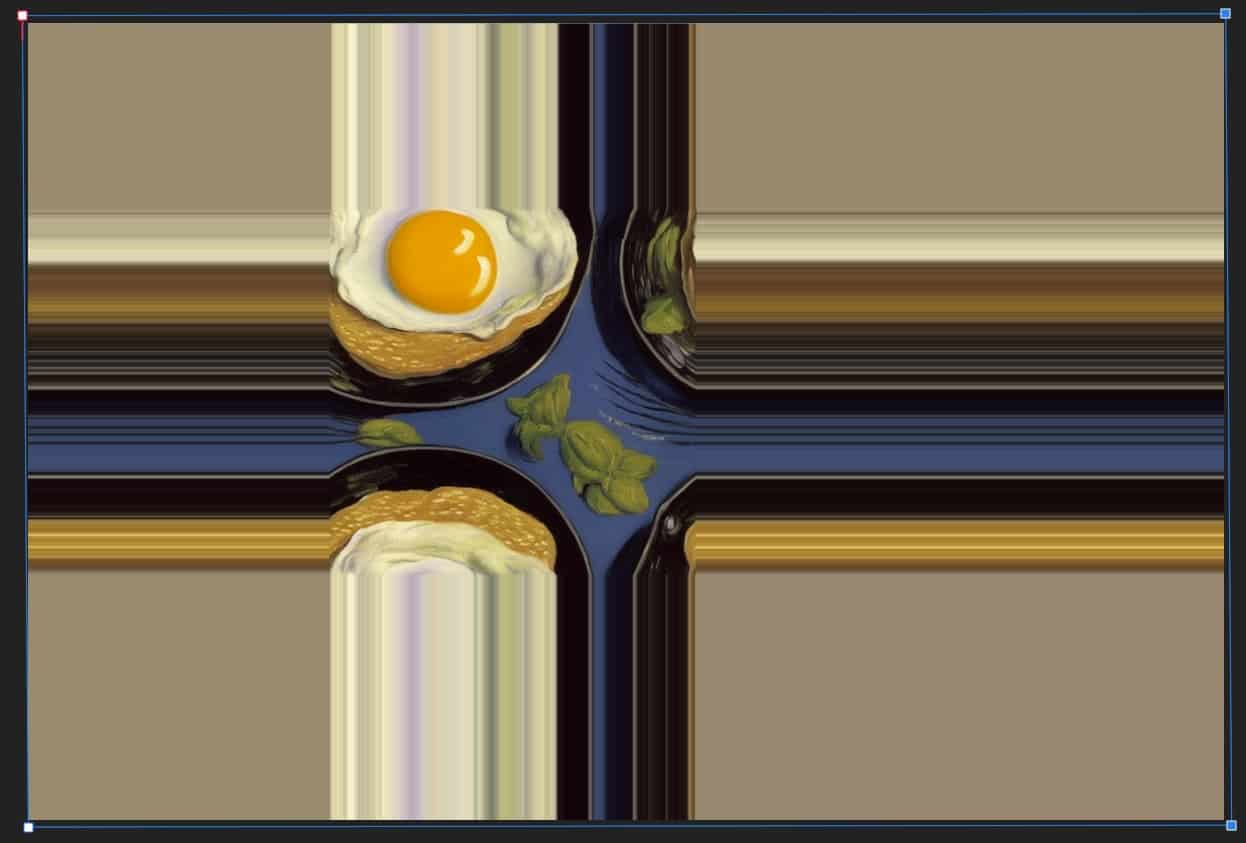
The default setting for Fill is ‘Repeat’, which is why we got a whole lot of repeated edge pixels. Change it to Wrap. This will fix everything.
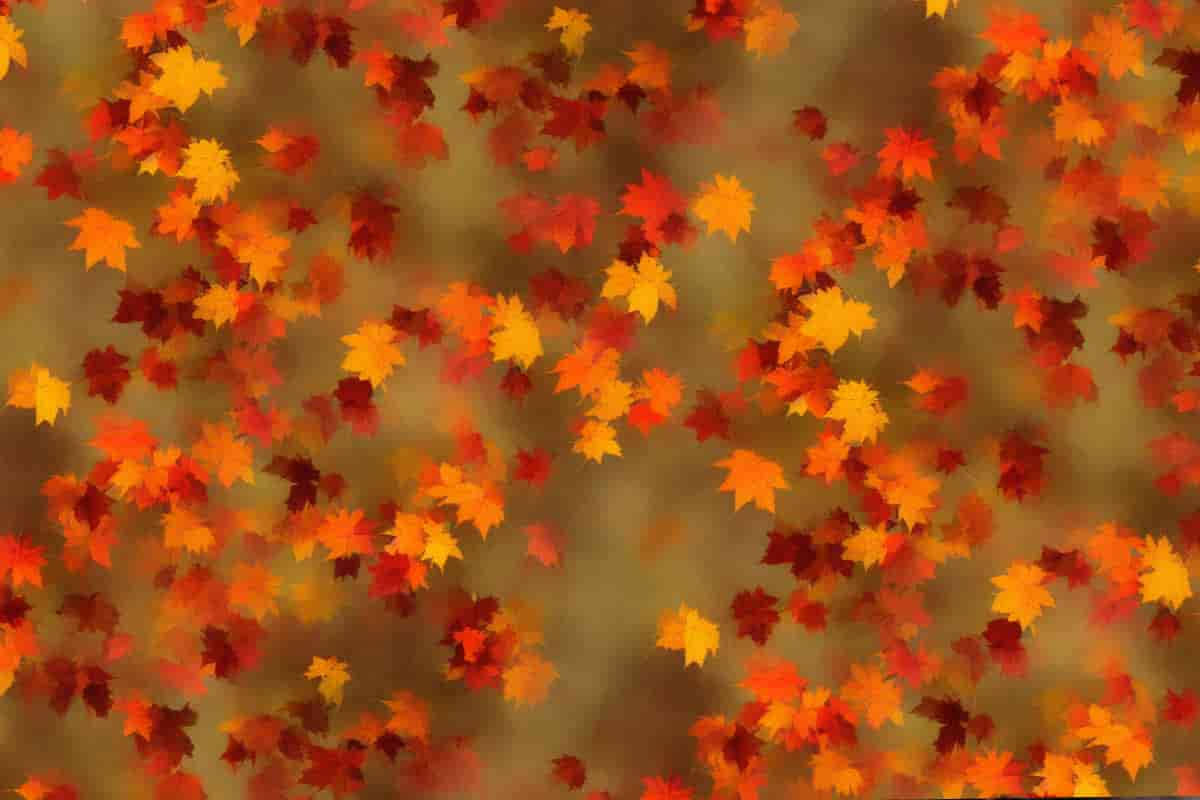
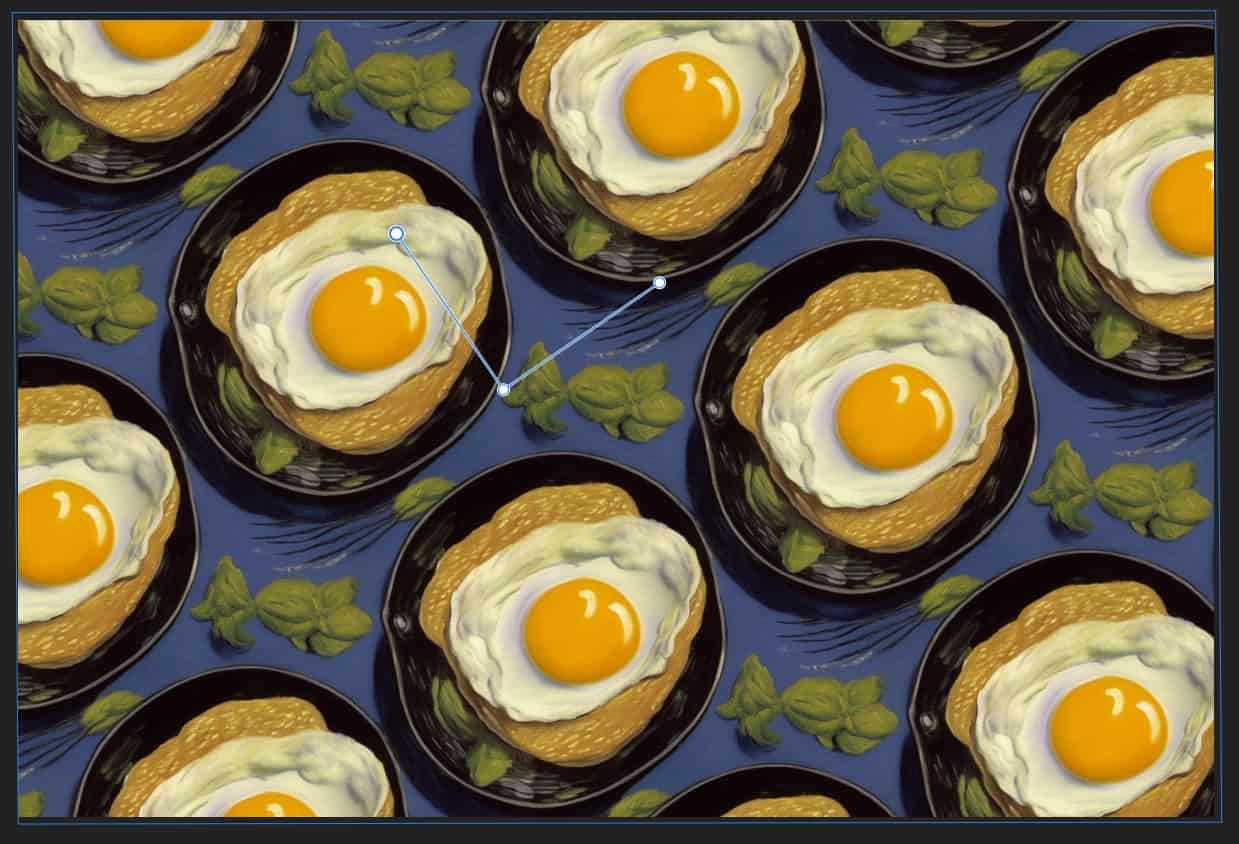
Now we’ve got this. Awesome! Except these eggs look no good in neat rows.
So let’s move the nodes to tilt and resize a little. Now I have myself a seamless tiled fried egg pattern, ready for export. Now I can do anything with this pattern-making superpower. The possibilities are endless!
But! Artificial intelligence doesn’t always give you what you want. (I’m not even sure I wanted these eggs, to be fair.) It may get you close, but there see those weird artifacts? For example, what if I’m not happy with those lines extending out from the bottom of the plates in the pattern above? I want to fix them by hand in painting software.
HOW TO EDIT STABLE DIFFISION TILES IN ARTRAGE VITAE
To do that, I would open the tile in Artrage Vitae.
(You might also use Krita, which was early to the Wrap functionality. Krita is free, but I haven’t used it myself in years as I have been using paid software, which has other advantages.)
I’ll do this the easy way: Right click on the original tile I saved from Stable Diffusion > Open with > Artrage Vitae.
Once the tile is open in Artrage Vitae, go to View > Canvas Settings (a drop down menu) > Advanced (a tab) > Select both ‘Tile Left and Right‘ and ‘Tile Top and Bottom‘.
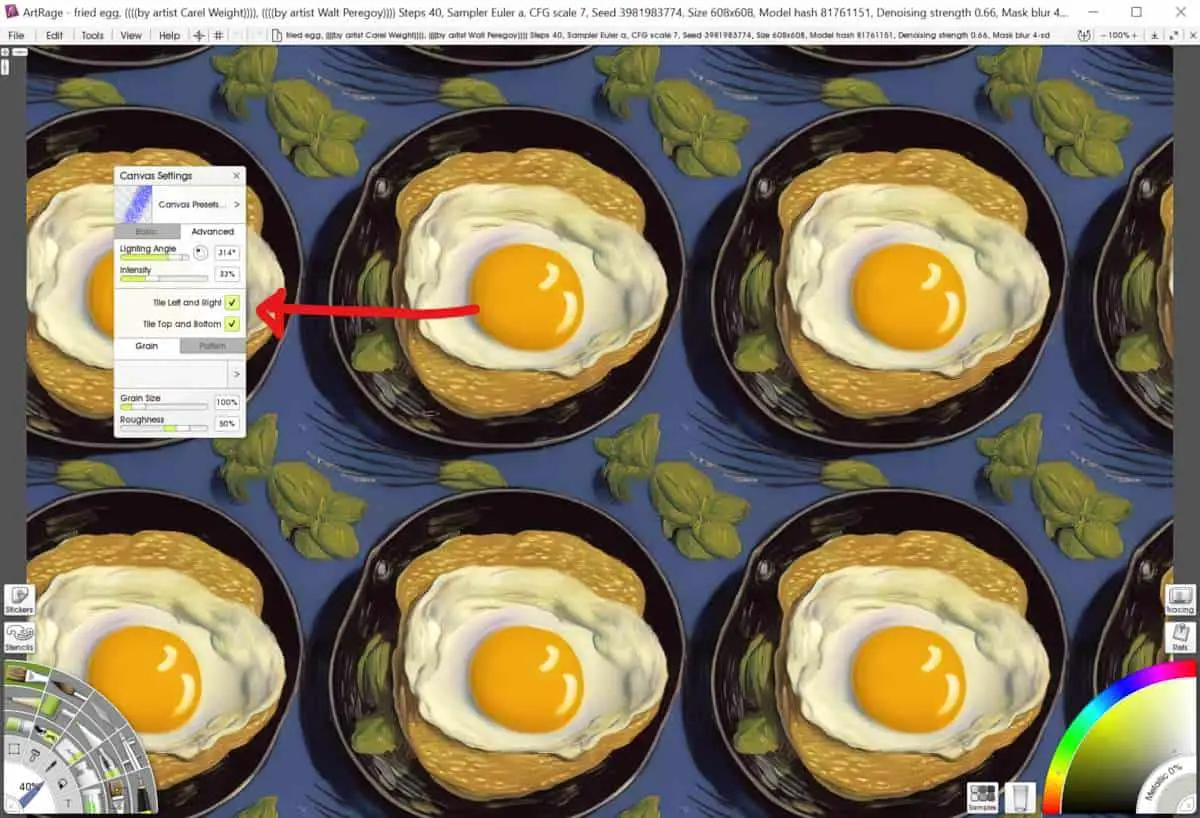
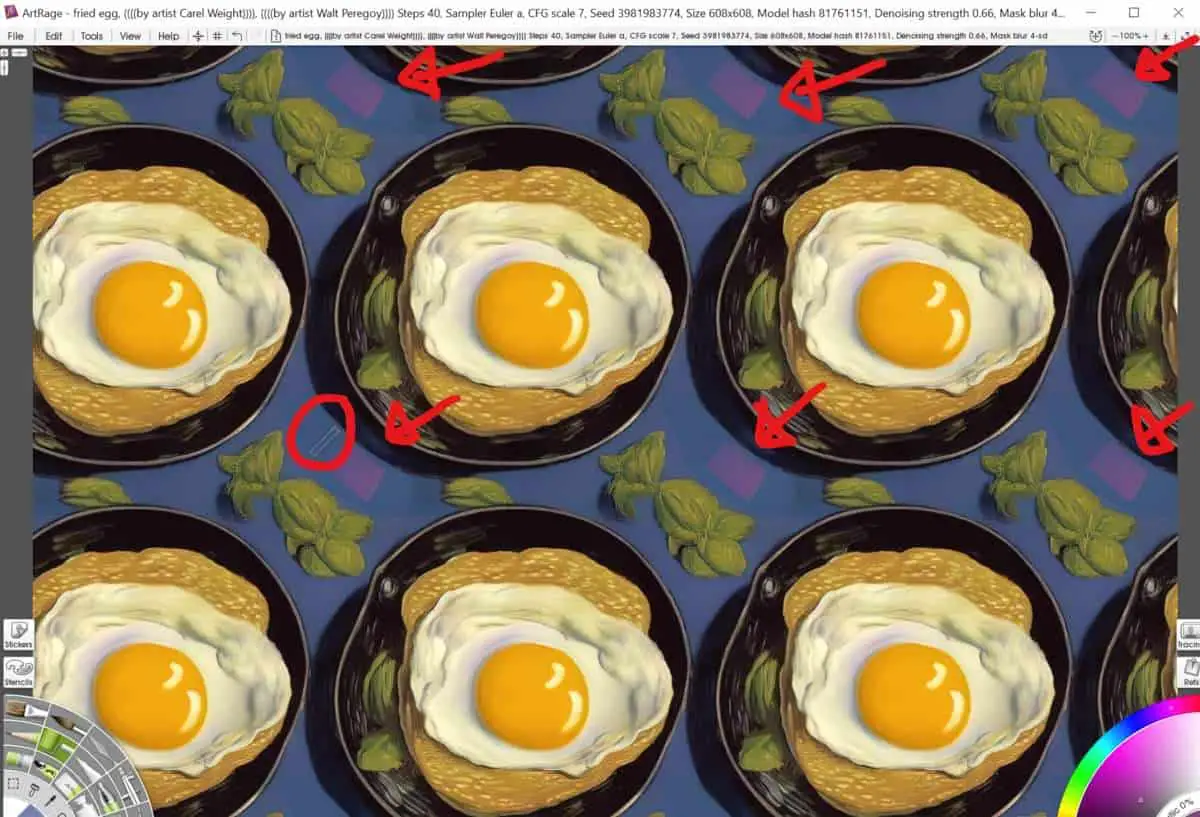
Now, if you paint on one part of this pattern, all other iterations of the fried egg change at the same time. It’s pretty cool to see in action, but I’ll give you a simple screenshot of how it works. I plonked some purple paint on for illustrative purposes. I’ve circled the position of my brush in red for you, and arrows point to six brushes on the canvas all working in unison. It’s like I have digital servants or something.
Okay so Artrage has its limitations. It is primarily a painting software, but with a few design software perks. You can’t tilt and resize like you can in Affinity Design.
What you can do is use Artrage to paint the tile you want it, and then import the single, edited tile back into Affinity Design. When you’re done fixing your egg, simply uncheck the both ‘Tile Left and Right’ and ‘Tile Top and Bottom’ options in Canvas Settings of Artrage Vitae. Now you have a single repeatable tile, fixed. Export.
THE POSSIBILITIES ARE ENDLESS, HEH